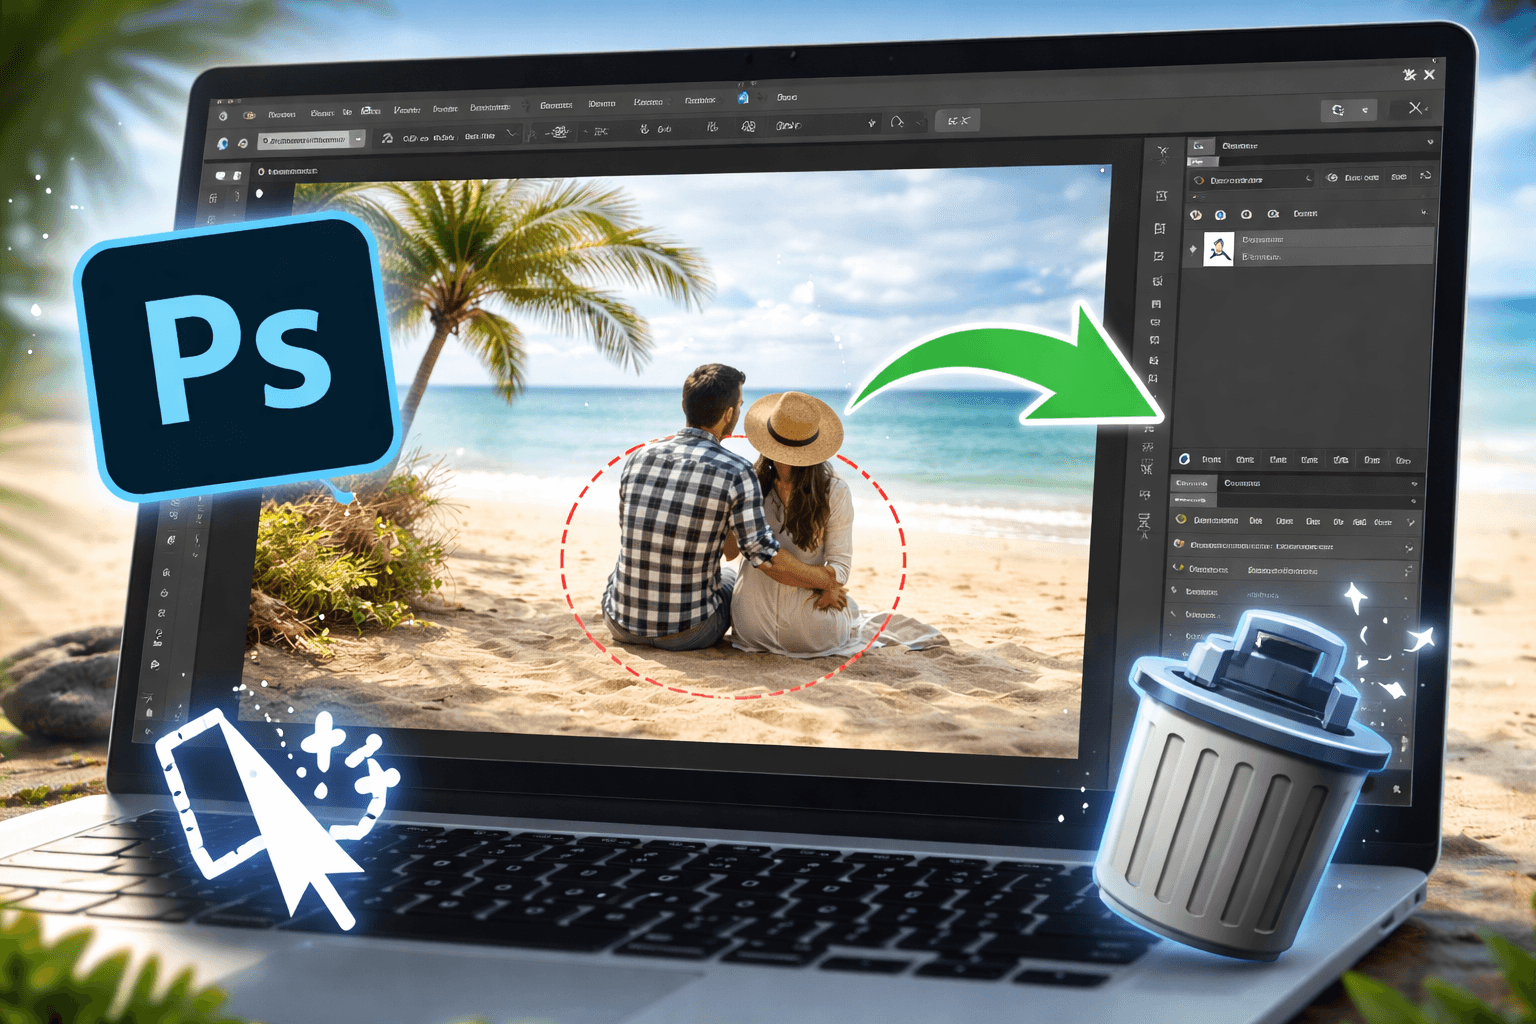
How to Remove an Object in Photoshop (Step-by-Step Guide + Easier AI Alternative)
Removing something from a photo sounds simple—until you actually try it in Photoshop.
Sometimes it works perfectly. Other times, you end up with blurry patches, weird textures, or edges that just don’t look right.
The truth is:
It’s not about whether Photoshop can do it—it’s about which tool you use, and when.
In this guide, I’ll walk you through the three most practical ways to remove objects in Photoshop based on real-world use. Then I’ll show you a much faster alternative if you don’t want to spend 10+ minutes fixing details manually.
Method 1: Content-Aware Fill (Best Starting Point)
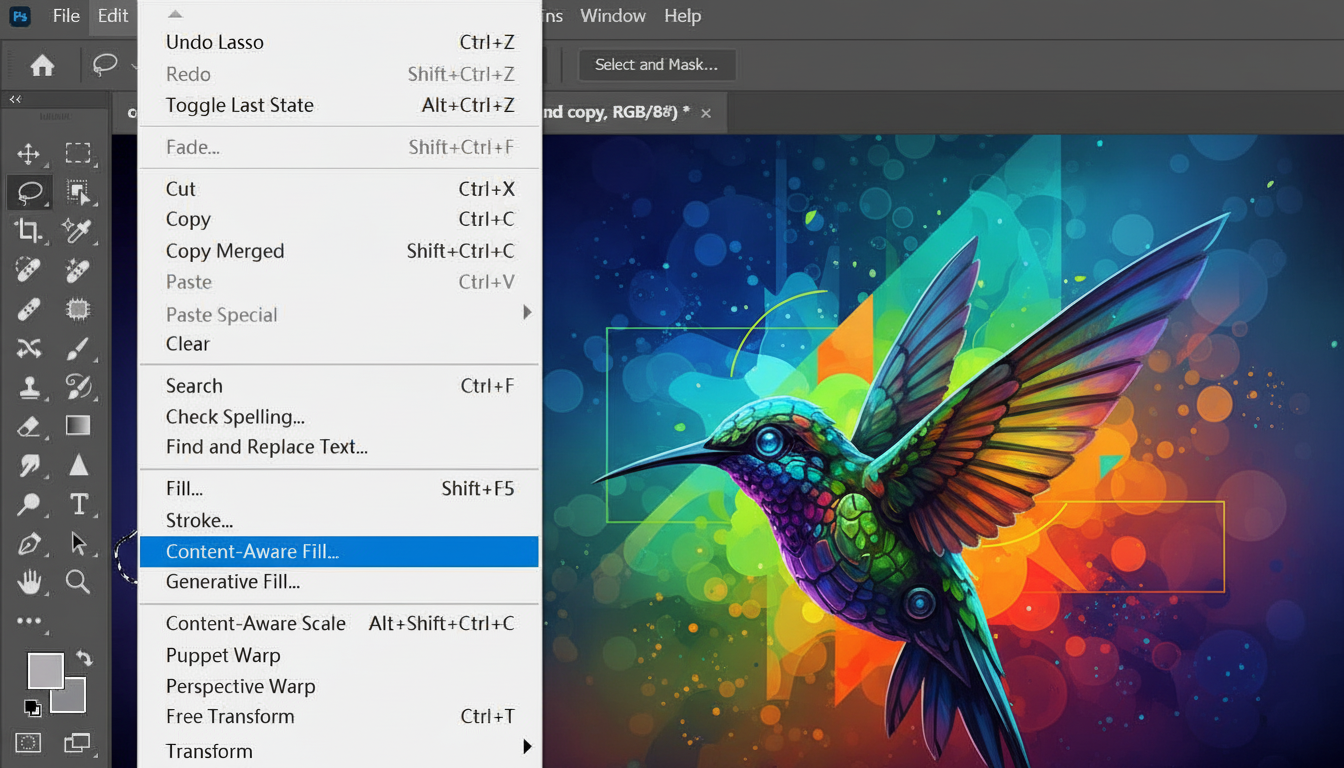 If you're not sure which tool to use, start with Content-Aware Fill.
It’s designed to automatically replace the selected area with pixels from the surrounding background. When it works, it feels almost like magic.
But it’s not as “one-click” as most tutorials make it sound.
When it actually works well:
-
Backgrounds like sky, grass, sand, walls
-
Small to medium-sized objects
-
Areas without strong patterns or straight lines
How to use it properly (this is where most people go wrong):
-
Select the object using the Lasso Tool→ Don’t draw too tightly—leave a small margin
-
Go to Edit → Content-Aware Fill
-
Look at the sampling area (green overlay)→ Remove areas that don’t match your background
-
Output to a new layer (always do this)
✅ Pros:
-
Fast and built into Photoshop
-
Great for simple backgrounds
-
Minimal manual work
❌ Cons:
-
Breaks easily on complex scenes
-
Often leaves blurry or repeating textures
-
Rarely gives a perfect result in one step
👉 Realistically: You’ll almost always need another tool after this.
Method 2: Clone Stamp Tool (When You Need Control)
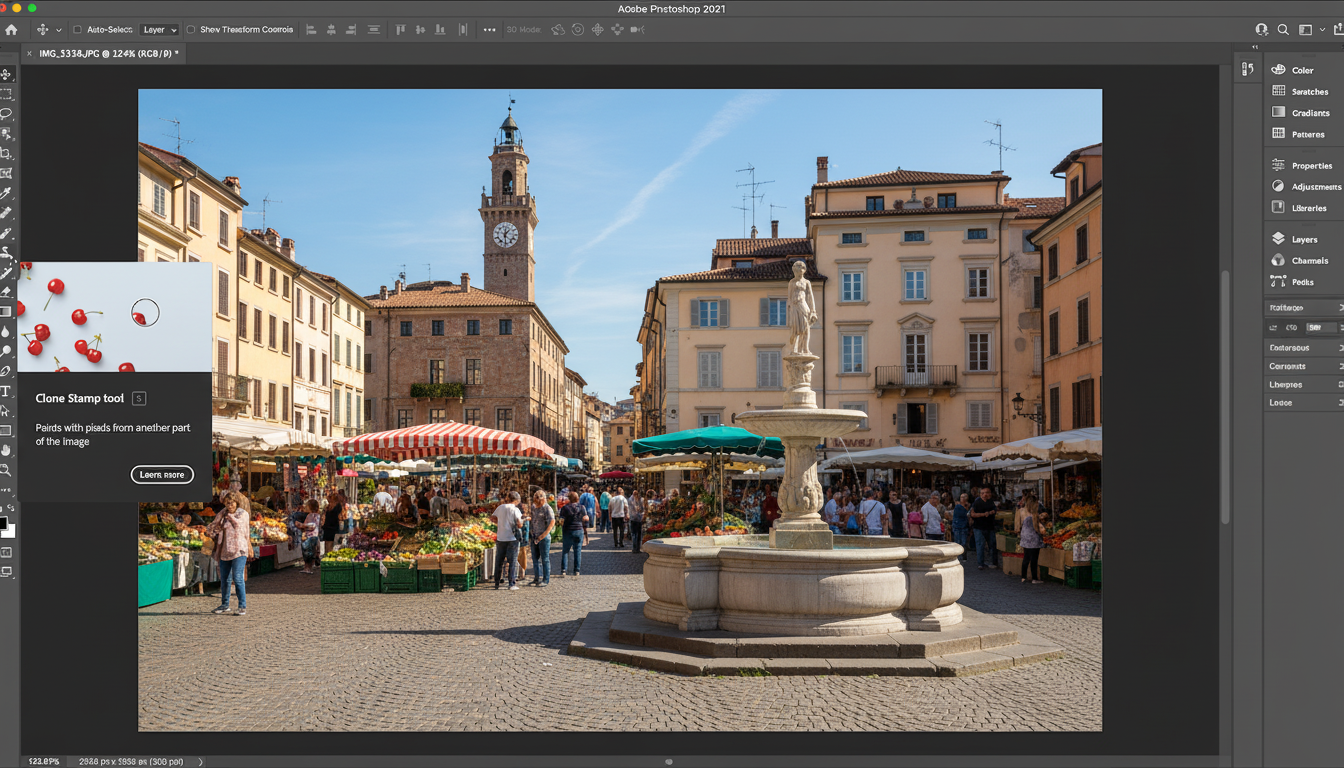 If Content-Aware Fill is automatic, Clone Stamp is manual—and that’s exactly why it works.
Instead of guessing, Photoshop lets you decide exactly which pixels to copy.
When you should use it:
-
When automatic tools create artifacts
-
When the background has structure (tiles, edges, lines)
-
When you need a clean, realistic result
How to avoid obvious edits:
-
Sample from different areas (not just one spot)
-
Keep changing your sample point
-
Use short, controlled strokes
-
Zoom out frequently to check realism
✅ Pros:
-
Maximum control
-
Works on complex backgrounds
-
Essential for professional results
❌ Cons:
-
Time-consuming
-
Requires practice
-
Easy to create repeating patterns
👉 Reality check: If you’re relying heavily on this tool, you’re basically rebuilding the image manually.
Method 3: Spot Healing Brush (Quick Cleanup Tool)
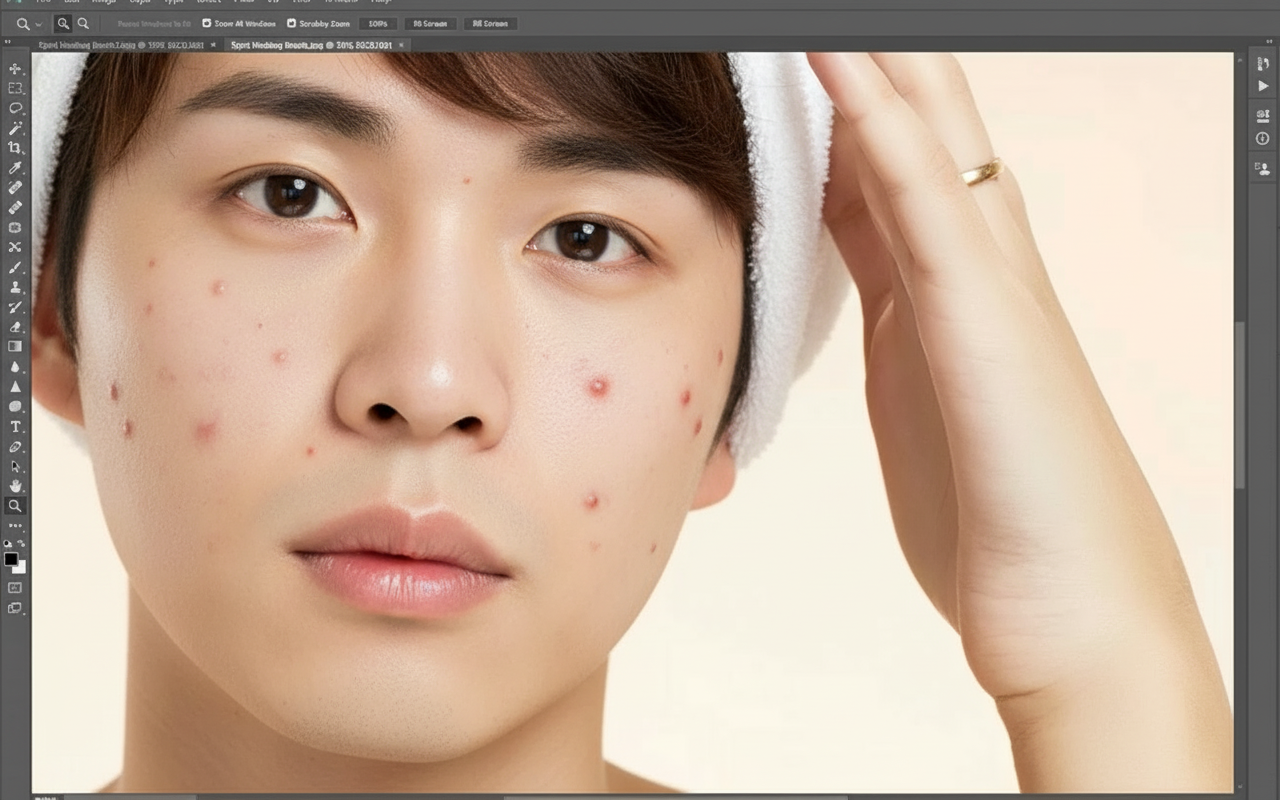 This tool is often misunderstood.
It’s not meant for removing large objects—it’s for fixing small imperfections.
Best use cases:
-
Dust spots
-
Small distractions
-
Cleaning up after other tools
How to use it effectively:
-
Use a brush slightly larger than the object
-
Click instead of dragging
-
Apply it at the end of your workflow
✅ Pros:
-
Extremely fast
-
Beginner-friendly
-
Great finishing tool
❌ Cons:
-
Not suitable for large objects
-
Poor control over results
-
Can easily distort edges
👉 Think of this as a final polish tool, not a main solution.
If you’re also trying to remove background from an image, you’ll likely find these tools even more frustrating—especially when dealing with complex edges like hair or shadows.
Real Examples: When Photoshop Works (and When It Doesn’t)
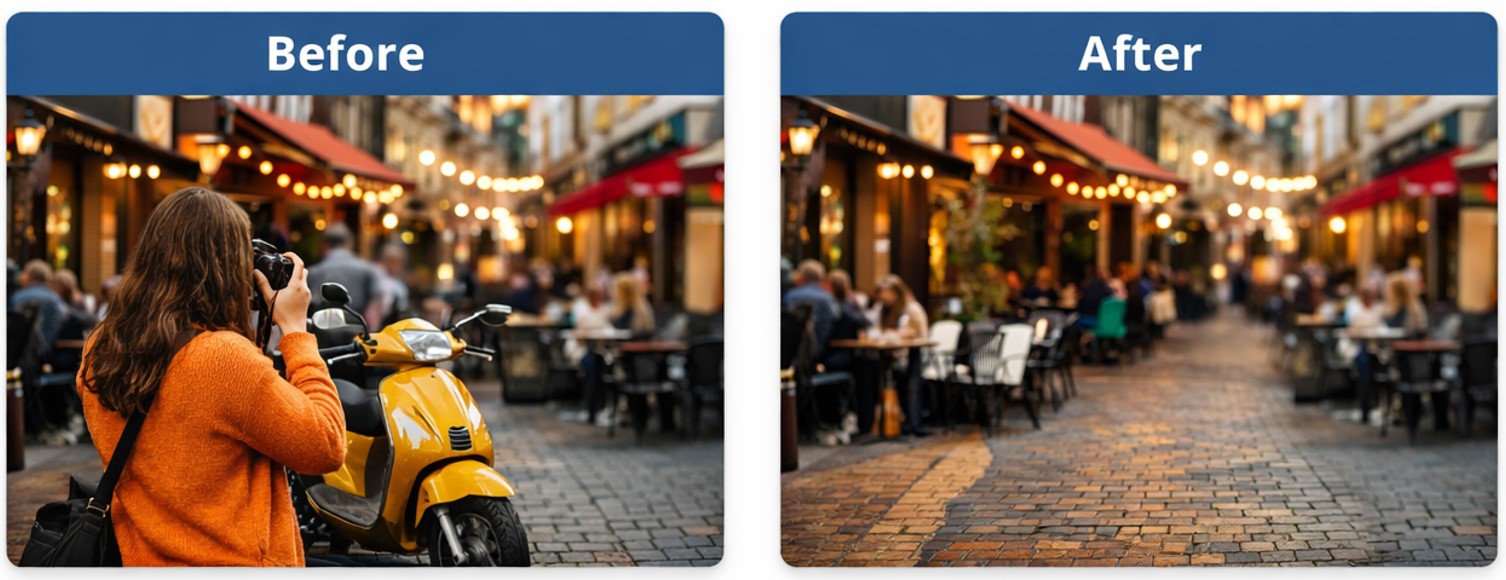
Removing a Person from a Photo
 This is where most people struggle.
Content-Aware Fill might work on simple backgrounds—but in real photos, it often creates smudges or repeating textures.
You’ll usually end up combining 2–3 tools to fix it.
👉 Time cost: 5–15 minutes per image
Removing a Logo from an Image
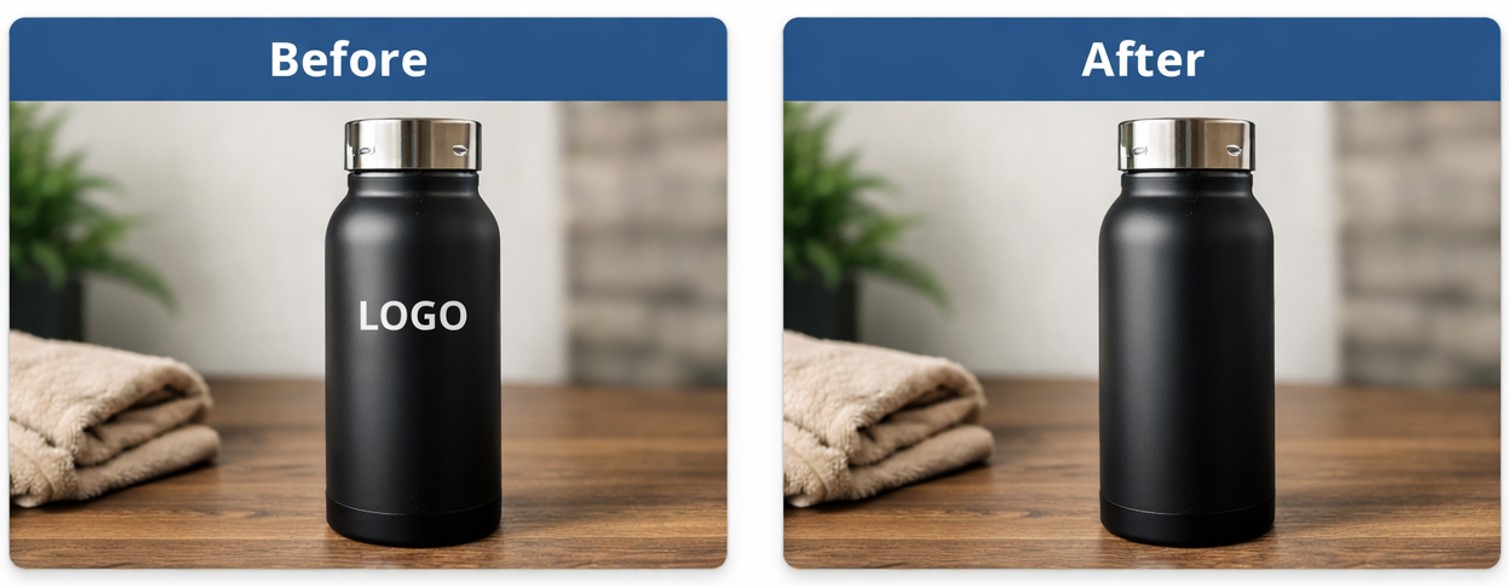 Photoshop actually performs well here.
With the Clone Stamp Tool, you can get very clean results—especially on simple backgrounds.
👉 But it still requires careful work and attention to detail.
Removing Objects from Complex Backgrounds
 This is where Photoshop becomes frustrating.
Too many patterns, edges, and textures make automatic tools unreliable—and manual tools slow.
👉 This is usually the breaking point for beginners.
Common Mistakes (That Make Edits Look Fake)
Most bad edits come from the same few mistakes:
1. Selecting Too Precisely
Tight selections don’t give Photoshop enough context → leads to visible edges
2. Ignoring Light and Shadows
Removing an object but leaving its shadow = instant giveaway
3. Repeating Patterns
Clone Stamp overuse creates obvious duplication
4. Zooming in Too Much
It looks perfect at 300% zoom—but unnatural at normal size
5. Expecting One Tool to Do Everything
Photoshop usually requires combining tools—not just one click
A Faster Alternative: AI Object Remover
 By now, you’ve probably noticed something:
Removing objects in Photoshop isn’t a single step—it’s a workflow.
That’s where AI tools take a completely different approach.
Instead of copying pixels, they reconstruct the background automatically.
When AI makes more sense:
-
You want fast results
-
You’re not experienced with Photoshop
-
The background is complex
-
You don’t want to manually fix edges
💡 Try Visualero AI Object Remover
Instead of switching between multiple tools, you can do this with AI Object Remover:
-
Upload your image
-
Brush over the object
-
Click remove
-
Download instantly
🎁 Free daily credits available — so you can test it without paying.
👉 The difference is simple:
-
Photoshop = control
-
AI = speed and simplicity
Final Thoughts
Photoshop is powerful—but it’s not always efficient.
If you’re working on high-end edits, it’s still the best tool. But for everyday tasks?
You don’t need perfection.You just need the object gone—and the photo to look natural.
That’s exactly why AI tools are becoming the default choice for most people.
FAQ: Removing Objects in Photoshop
Can Photoshop remove objects automatically?
Yes, Photoshop can remove objects automatically using tools like Content-Aware Fill and the Spot Healing Brush. However, the results depend heavily on the background. Simple areas like sky or walls usually work well, but complex scenes often require manual adjustments.
What is the easiest way to remove an object in Photoshop?
The easiest method is using Content-Aware Fill. It allows you to select an object and automatically replace it with surrounding pixels. That said, it’s rarely perfect on the first try and may require additional cleanup using tools like Clone Stamp.
Why does Content-Aware Fill sometimes look bad?
Content-Aware Fill struggles when the background has patterns, edges, or fine details. It may create blurry patches or repeating textures because it doesn’t fully understand the image context—only nearby pixels.
How do professionals remove objects in Photoshop?
Professionals usually combine multiple tools instead of relying on just one. A typical workflow includes:
-
Content-Aware Fill for initial removal
-
Clone Stamp for precise corrections
-
Healing tools for final cleanup
This layered approach produces more natural-looking results.
What is the best alternative to Photoshop for removing objects?
AI-powered tools are the easiest alternative. They can remove objects in just a few clicks without manual editing. Instead of copying pixels, AI reconstructs the background, which often leads to cleaner and faster results.
Can I remove objects from photos without Photoshop?
Yes, you can use AI object remover tools online without installing Photoshop. These tools are especially useful for beginners or anyone who wants quick results without learning complex editing techniques.
How long does it take to remove an object in Photoshop?
It depends on the image complexity.
-
Simple background: 1–2 minutes
-
Medium complexity: 5–10 minutes
-
Complex scenes: 10–20+ minutes
AI tools can often reduce this to just a few seconds.
Share this article
Help others discover this content
Related Articles
View all
How to Incorporate Yourself in AI Image Generator: A Complete Guide
Struggling to make AI-generated images look like you? This guide explains how to incorporate yourself in an AI image generator, select the right photo, and use Visualero’s models for realistic results.
How to Make AI Video of Photo Without Looking Strange
Learn how to make AI video of photo without looking strange. Avoid common mistakes, improve realism, and create smooth, natural animations with simple steps.

How to Combine Two Images (3 Easy Ways That Actually Work)
Learn how to combine two images using simple methods like side-by-side layout, blending, or overlay. Includes Photoshop steps and an easier AI solution.
Remove Unwanted Objects Instantly
Erase distractions, watermarks, and unwanted elements from your photos with one click. AI-powered precision removal.