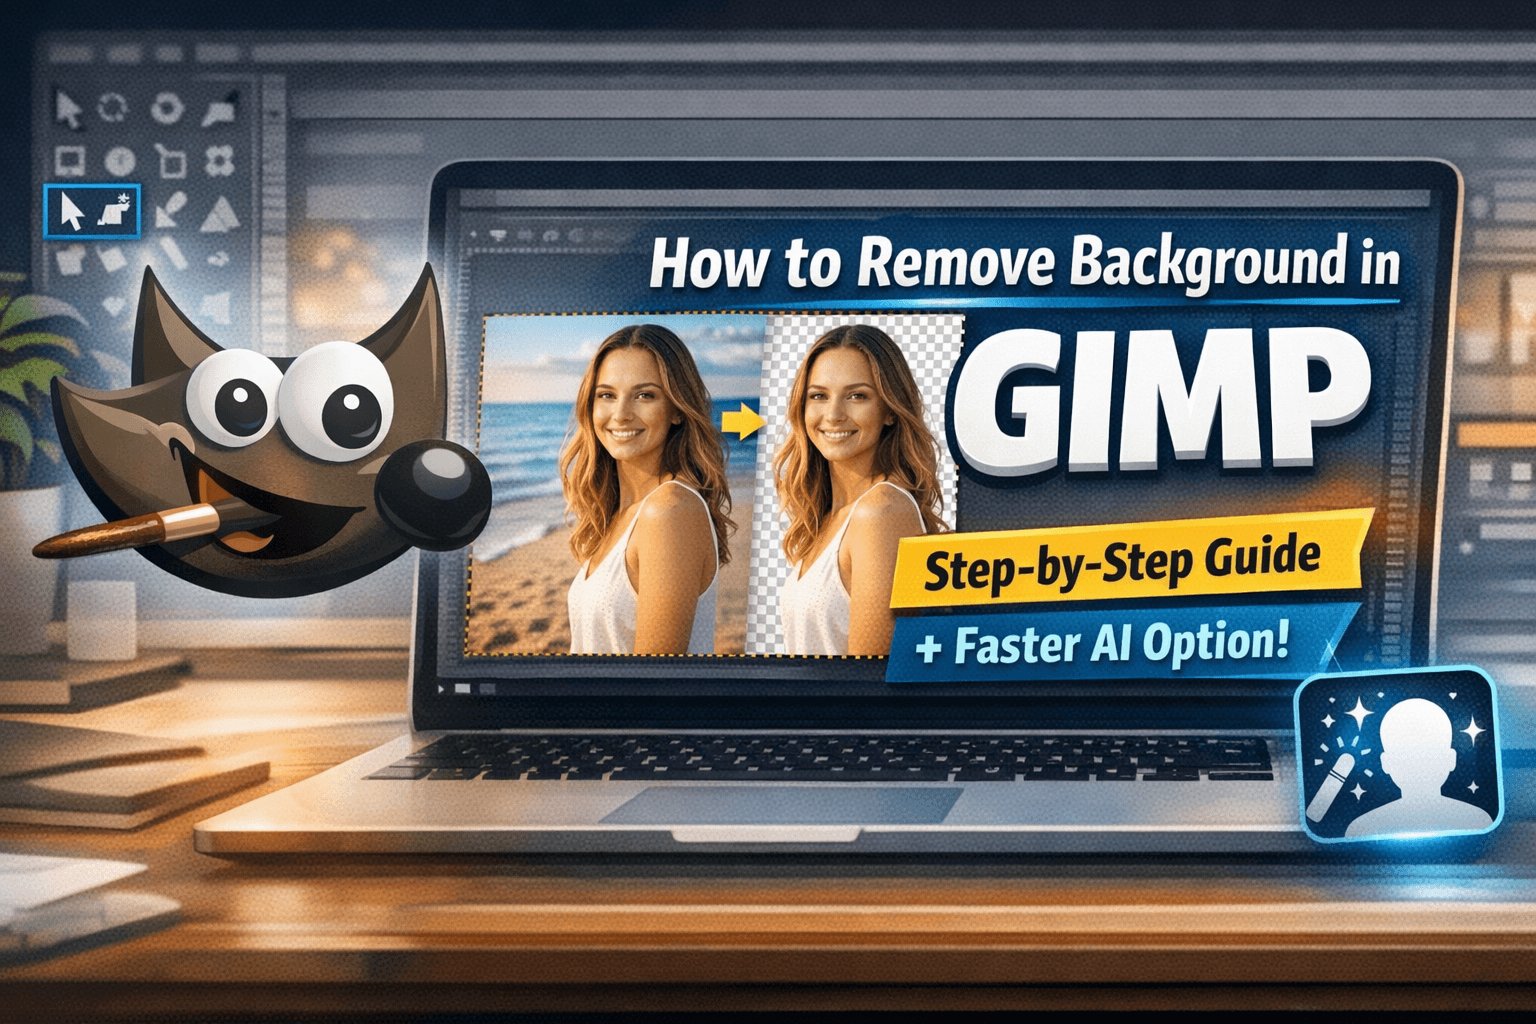
How to Remove Background in GIMP (The Complete Practical Guide)
Removing the background from an image is one of those fundamental skills every designer, marketer, and content creator needs. Whether you’re preparing product photos for an e-commerce store, isolating a subject for a social media post, or creating a clean thumbnail, mastering background removal opens a lot of creative possibilities.
GIMP is a powerful free tool for this, but background removal can be tricky. Edges get jagged, hair looks messy, and shadows often get lost. In this guide, we’ll cover everything—from simple one-click selections to professional pixel-level techniques.
Quick Answer
If you just need the steps:
-
Open your image in GIMP.
-
For simple backgrounds, use Fuzzy Select Tool.
-
For real-world photos, use Foreground Select Tool.
-
For fine details like hair, use Layer Masks.
-
Delete the background and export as PNG.
For high-quality results, read on for step-by-step instructions and pro tips.
Before You Begin
-
Add Alpha Channel: Right-click your layer → Add Alpha Channel (enables transparency).
-
Duplicate the Layer: Always work on a copy to keep the original intact.
-
Zoom In: 200–400% zoom is crucial for refining edges.
Method 1: Fuzzy Select Tool (Magic Wand)
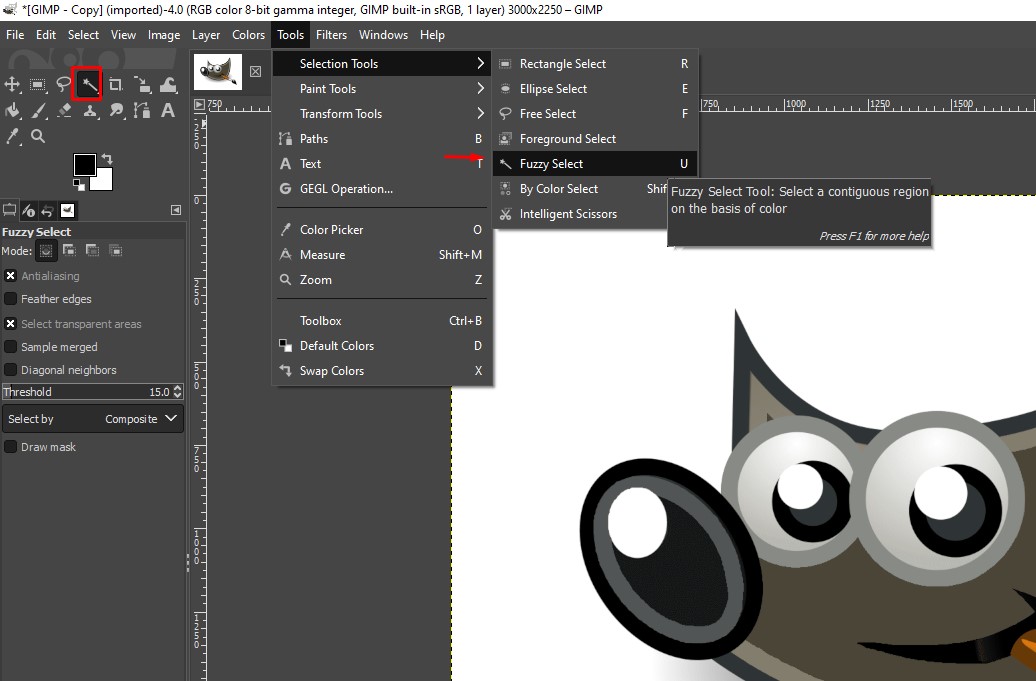 Best for: Simple, uniform backgrounds (white, black, solid color)
How it works: Fuzzy Select chooses pixels based on color similarity in a connected area. It works best when the background is clean and clearly separated from the subject.
Steps:
-
Open your image in GIMP
-
Select the Fuzzy Select Tool (U)
-
Click on the background
-
Adjust the Threshold until the selection covers the entire background
-
Press Delete
-
Export as PNG
Pros:
✔ Very fast and beginner-friendly
✔ Ideal for clean product photos
✔ Minimal setup required
Cons:
✘ Struggles with gradients and shadows
✘ Leaves rough or jagged edges
✘ Doesn’t work well for complex images
Pro tips:
-
Increase threshold gradually—don’t max it out immediately
-
Use Shift + Click to add missed areas
-
Apply Feather (1–2 px) to smooth edges
-
If edges look rough, refine with a Layer Mask
Method 2: Foreground Select Tool
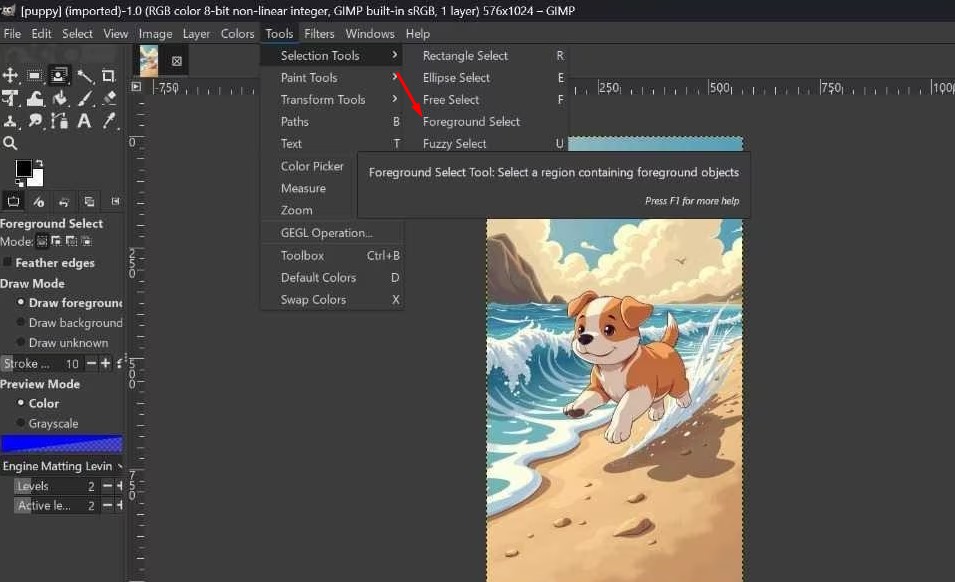 Best for: People, objects, and most real-world images
How it works: You roughly outline the subject, then “paint” over it so GIMP can intelligently separate foreground from background.
Steps:
-
Go to Tools → Selection Tools → Foreground Select
-
Draw a rough outline around your subject
-
Press Enter
-
Paint over the subject to mark it as foreground
-
Press Enter again to apply selection
-
Go to Select → Invert
-
Press Delete
-
Export as PNG
Pros:
✔ Works well for most photos
✔ Faster than manual tracing
✔ Good balance between speed and accuracy
Cons:
✘ Requires some trial and error
✘ Edges (especially hair) may look messy
✘ Not fully automatic
Pro tips:
-
Use a smaller brush when marking detailed areas
-
Zoom in for better control on edges
-
Don’t overpaint—focus on key subject areas
-
Combine with Layer Mask for final refinement
Method 3: Layer Mask (Non-Destructive Editing)
 Best for: Hair, fur, soft edges, and detailed cutouts
How it works: Layer masks let you hide or reveal parts of an image without permanently deleting pixels. This gives you maximum control and flexibility.
Steps:
-
Duplicate your image layer
-
Right-click → Add Layer Mask → White (full opacity)
-
Select a soft brush
-
Paint black to hide the background
-
Paint white to restore details
-
Zoom in and refine edges carefully
-
Export as PNG
Pros:
✔ Highest level of control
✔ Non-destructive (fully reversible)
✔ Best for complex edges like hair and fur
Cons:
✘ Time-consuming
✘ Requires practice and patience
✘ Not ideal for quick edits
Pro tips:
-
Use a soft brush (0–50% hardness) for natural edges
-
Work at 200–400% zoom for precision
-
Lower brush opacity for subtle blending
-
Always keep an untouched original layer
Method 4: Paths Tool (For Pixel-Perfect Precision)
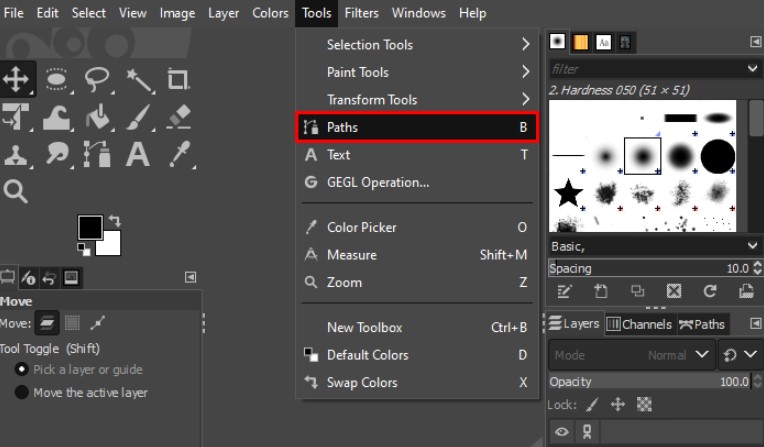 Best for: Logos, product images, UI elements, and subjects with clean, sharp edges
How it works: The Paths Tool lets you manually trace your subject using vector paths. It’s the most precise method in GIMP—but also the most time-consuming.
Steps:
-
Select the Paths Tool (shortcut: B)
-
Click around the edges of your subject to create anchor points
-
For curves, click and drag to create smooth lines
-
Close the path by connecting back to the starting point
-
Click “Selection from Path” in the tool options
-
Go to Select → Invert
-
Press Delete to remove the background
-
Export as PNG
Pros:
✔ Extremely precise for clean edges
✔ Ideal for logos and product cutouts
Cons:
✘ Slow and manual
✘ Not suitable for hair or complex textures
Pro tips (this is where most guides fall short):
-
Use fewer points—more points often create jagged edges
-
Drag handles for curves instead of placing too many anchors
-
Apply Feather (1–2 px) to soften edges slightly
-
Refine with a Layer Mask if edges look too harsh
Method 5: Select by Color Tool
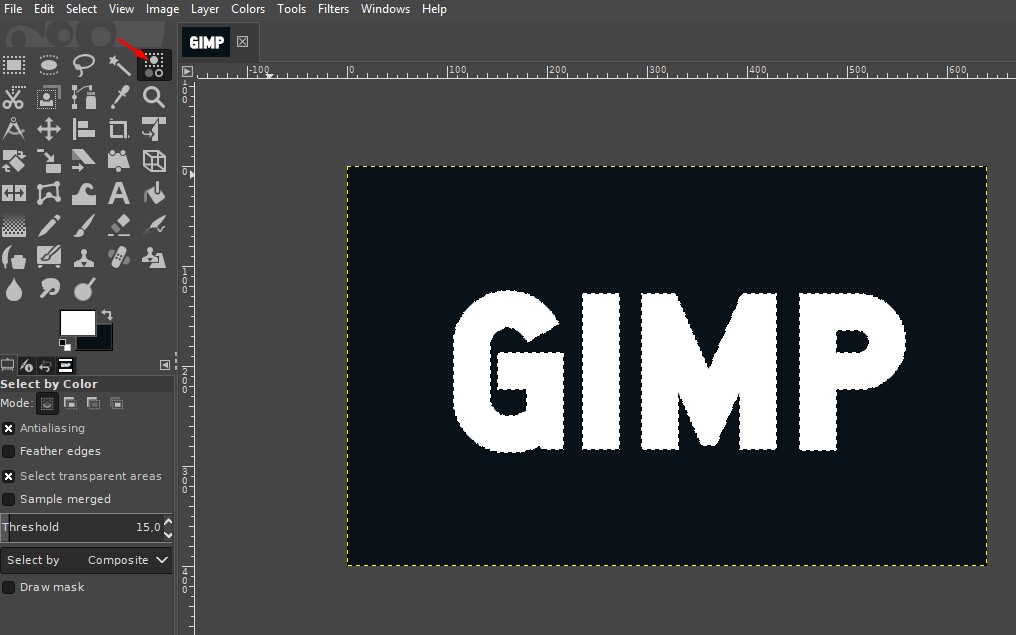 Best for: Solid-color backgrounds (white, black, studio backdrops)
How it works: Unlike Fuzzy Select, this tool selects similar colors across the entire image—not just connected areas.
Steps:
-
Select Select by Color Tool (Shift + O)
-
Click on the background color
-
Adjust the Threshold:
-
Lower = more precise
-
Higher = includes shadows and gradients
-
Press Delete to remove the background
-
Export as PNG
When is this better than Fuzzy Select?
-
When the same color appears in multiple areas
-
When the background isn’t fully connected
-
When you want faster global selection
Pros:
✔ Faster than Fuzzy Select for flat backgrounds
✔ Works well for batch-style images
Cons:
✘ Breaks down on complex or textured backgrounds
Practical tips:
-
Enable Feather edges (1–3 px) to avoid jagged outlines
-
If you see a white halo → use Select → Shrink (1 px)
-
If part of the subject is selected → lower the threshold or refine with a mask
Faster Alternative: Visualero AI Background Remover
If manually removing backgrounds in GIMP feels too slow or tedious, Visualero’s AI Background Remover can help you get clean, professional results in seconds. It handles complex edges, hair, and shadows automatically—no manual outlining required.
 How it works:
-
Upload your image.
-
The AI detects the subject and removes the background instantly.
-
Download a clean PNG with transparent background.
Why it’s worth trying:
-
Instant results—1 second per image.
-
Works on photos, products, logos, and illustrations.
-
Handles tricky details like hair and fur.
-
Browser-based—no installation required.
-
Free daily credits: Each user gets 5 free background removals per day.
👉 Try Visualero Background Remover for Free
FAQs
1. Can GIMP remove backgrounds automatically?
Not fully. It requires manual selection. Use Foreground Select or Layer Masks for the best results. AI tools like Visualero can automate the process.
2. How do I remove hair or fur?
Use Layer Masks + soft brush. Zoom in 200–400% and paint carefully. Fuzzy Select will almost always fail for fine hair.
3. How can I keep natural shadows?
Duplicate the layer → remove background on top → mask out everything except shadows on the bottom layer. This is advanced but preserves realistic depth.
4. Can I do batch background removal in GIMP?
Not efficiently. You must manually repeat steps for each image. Visualero supports batch processing.
5. Why is my exported PNG showing a white background?
Make sure Alpha Channel is added and export format is PNG. JPG does not support transparency.
Final Thoughts
GIMP gives you full creative control, from Fuzzy Select to Layer Masks, but it can be slow and tricky for beginners. For quick, professional-quality results—especially for hair, shadows, or batch work—Visualero is the fastest, most reliable alternative.
Whether you prefer manual control or 1-click AI removal, mastering these methods ensures every image looks polished and ready for any project.
Share this article
Help others discover this content
Related Articles
View all
How to Incorporate Yourself in AI Image Generator: A Complete Guide
Struggling to make AI-generated images look like you? This guide explains how to incorporate yourself in an AI image generator, select the right photo, and use Visualero’s models for realistic results.
How to Make AI Video of Photo Without Looking Strange
Learn how to make AI video of photo without looking strange. Avoid common mistakes, improve realism, and create smooth, natural animations with simple steps.

How to Combine Two Images (3 Easy Ways That Actually Work)
Learn how to combine two images using simple methods like side-by-side layout, blending, or overlay. Includes Photoshop steps and an easier AI solution.
Remove Backgrounds Instantly
Skip the manual work. Visualero's AI Background Remover handles complex edges, hair, and shadows in seconds. Try it free with 5 daily credits.